![]()
How-to Replace the Icon for any Fire TV App
This tutorial will show you how to find the file paths for any Amazon Fire TV app so you can replace the app icons.
1. Sideload ES File Explorer (follow this tutorial)
2. Launch ES File Explorer

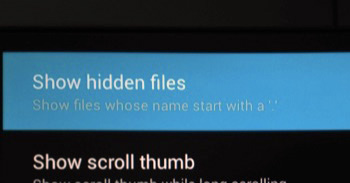
3. Go to Settings > Display settings > Enable ‘Show hidden files’
4. Go back to the main menu and go to ‘Device’

5. Go to sdcard > .imagecache > com.amazon.venezia > select app (make note of this folder name starting with com…)

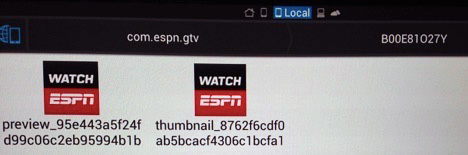
6. Open the folder that starts with B00… (make note of the folder name)

7. You should see two image files (one that starts with preview… and one with thumbnail…). You will need to rename your desired image files to this and place them on your Desktop. Make sure the thumbnail file size is 121×121 and the preview is 365×365 both in .png format.
8. You will need to replace both the preview and thumbnail files. Connect to the Fire TV and insert the following comment in Command Prompt or Terminal and hit enter:
Windows:
adb push C:\Users\YOURUSERNAME\Desktop\thumbnail_####.png /sdcard/.imagecache/com.amazon.venezia/FolderNameInStep5/FolderNameInStep6/
Insert the following command and press enter:
adb push C:\Users\YOURUSERNAME\Desktop\preview_####.png /sdcard/.imagecache/com.
amazon.venezia/FolderNameInStep5/FolderNameInStep6/
Mac:
./adb push /Users/YOURUSERNAME/Desktop/thumbnail_####.png /sdcard/.imagecache/com.amazon.venezia/FolderNameInStep5/FolderNameInStep6/
Insert the following command and press enter:
./adb push /Users/YOURUSERNAME/Desktop/preview####.png /sdcard/.imagecache/com.amazon.venezia/FolderNameInStep5/FolderNameInStep6/
In my example, I would enter in:
adb push C:\Users\YOURUSERNAME\Desktop\preview_95e443a5f24fd99c06c2eb95994b1b.png /sdcard/.imagecache/com.
adb push C:\Users\YOURUSERNAME\Desktop\tumbnail_8762f6cdf0ab5bcacf4306c1bcfa1.png /sdcard/.imagecache/com.
Thanks for the tutorial, very handy!
it’s worth mentioning since the recent update that allows for USB sticks to be read, you can copy the images to USB and replace them. It’s a bit easier than writing down long filenames.
1. Using ES Explorer copy the folder containing the images you want to replace
2. Paste the folder to your USB stick
3. Eject the USB using the Amazon system controls
4. Open the images on your desktop computer, edit them (pasting in the replacement images using an image editor)
5. Save the image, and eject the USB stick
6. Plug the USB back into the Fire TV
7. Copy the images using ES, and paste the over the ones you want to replace.
8. Power down the FireTV holding the center and play button.
9. When it reboots, your new images are shown
Thanks again
To make things even easier…
In ES File Explorer go to tools and turn on remote manager, then use filezilla on a computer to go to the image directory to replace the files.
Did something similar to Matt. Used ES Explorer, then with Fire Stick remote was able to access my network hard drive, where I put the two images. Then just copy icons, then paste into B00 folder where I used Ikono TV images. I just delete Ikono images. Make sure your Kodi images use same file name. Had to boot my stick a couple times and there it was. I wasnt able to push with adb or find classic tv but great article. Thanks